Image Map
Showing posts with label tip tueday. Show all posts

Tuesday, June 3, 2014

Tip Tuesday: The Do's & Don'ts of Bronzing

Welcome to Tip Tuesday of this weeks special edition Bronzing week here at Winky Pink! I Absolutely LOVE bronzers! It's no lie. I contour with them every day of the year, and warm my pale skin with them all day every day during the summer and warmer months. Today I'm going to tell you some do's and don'ts that I rigorously follow when applying bronzer.

DO
  • use a fairly fluffy brush when your are applying your bronzer. I've seen so many people flub up their makeup by thinking that they can draw lines on their face to make it look more contoured. NO! fluffy brushes are your friend when you are contouring your face. The last thing you want are streaks on your cheeks. My favorite brush to use right now is the Eco Tools fan brush (pictured above).
  • use a shade that is only few shades darker than your natural skin tone. This will make it look way more natural and blend seamlessly into your skin.
  • use a matte (or skinfinish) shade if you are contouring with your bronzer. There are so many sparkly bronzers on the market. Trust me. Sparkle draws attention, and if you are trying to contour, that means you are trying to NOT draw attention to that particular area. Matte bronzers are your best friend for this purpose! My favorites are Too Faced Chocolate Soleil, Tart Park Avenue Princess in Matte, Revlon Photoready Bronzer, and Essence Sun Club Matte Bronzer.
  • make sure you know exactly where you need to place your bronzer. You don't want it all over your face. Contouring is your best friend. So, unless you want to look muddy, only take your bronzer where you absolutely need too.
  • take it down your neck a little. You want your neck to match your face. No white necks with tan faces. It looks horrible!
DONT
  • over do it. I know that the idea of looking skinnier is appealing, there is definately a line that can be crossed. You want things to look natural. 
  •  use too much product. A little goes a long way people. Only pick up a small amount on your brush. You can always add more if you think you need it.
  • use a shade that doesn't flatter your skin tone. Know what your undertones are and know what looks best on you. There are orangy bronzers out there that look stellar on some people. Guess what? Those people usually have orange under tones, which means that they have a lot of red and yellow pigments in their skin, as apposed to more blue and red. I heard so many ladies rave about NYC Sunny bronzer, and when I picked it up and tried to use it I looked like an Umpa Loompa! Badly! So, I try to steer more towards cool toned bronzers. But, trust me NYC Sunny is so so so pretty on lots of skin tones, just not mine :)
  • put bronzer on your skin where clothing will be rubbing it. Especially if you will be wearing white! A white collard shirt can quickly yuck up if you pull your bronzer down your neck a little too far. Just be mindful and careful with this.
That's all for my do's, and don'ts. Let me know if you have any other tips or tricks that you use when applying bronzer!

Tuesday, May 13, 2014

Tip Tuesday: An easy way to travel with Z Palette

Do you travel a lot during the summer? I know I do! It's a love/hate thing with me. I'm a total homebody, and traveling really stresses me out with my 3 kids. But, love it or hate it, I do it a lot when my kids are out of school for the summer.


I have been thinking a lot about streamlining my travel essentials, and more specifically, my makeup travel essentials. I really haven't seen an all-in-one palette that has everything I'll need in one place. So, I decided to make one! Aside from brushes and mascara, my customized Z Palette has it all! I'll take you through what I put inside mine, so you can get ideas for if you want to make one! I have a de-potting post here, if you would like to know how I de-pot stuff to put inside my palettes.


1. Too Faced Chocolate Soleil Bronzer (travel size)
2. Mongo Kiss Vanilla Honey Lip Balm
3. Lip Stick (sorry, I de-potted this a while ago and don't remember the color)
4. Physicians Formula Happy Booster Glow & Mood Boosting Powder in "Translucent"
5. Physicians Formula Mineral Wear Talc-Free Mineral Airbrushing Pressed Blush in "Rose"
6. Cover Girl + Olay Concealer in "Fair"
7. Lauren Brooke Cosmetiques Pressed Mineral Foundation (sample size)
8. Assorted eye shadows: Top Row, The Body Shop "Pink Crush" & Elf  "Beauty Queen" Middle Row, The Body Shop "Chocolate Linger" & The Body Shop "Caramel Flirt" Bottom Row,
The Body Shop "Coconuts About You" & Elf "What's your name?"


Aside from mascara, brushes, eyeliner and maybe liquid foundation I have everything I need in this travel-friendly compact. The Z Palettes are sturdy enough that I feel like they will travel just fine if you maybe wrap it in some PJ pants or a t-shirt. The plastic top almost feels as sturdy as glass!


Tuesday, May 6, 2014

Tip Tuesday: On trend for Spring/Summer - BOLD colors!

One of the hottest trends right now is hot hues for your hair and eyes! With the recent release of the Urban Decay Electric palette, things have gone retro, and people are rocking bold, bright colors! I personally have a hard time putting my looks out there are doing some bold colors, so I thought I would start small. I hauled a palette yesterday, and I cannot stop playing with it! So many fun colors, and so many possibilities!

The Wet n Wild 5 pan eyeshadow palette in "Art in the Streets" has awesome pigmentation, and can be used for hair as well as eyes! For a pop of color to any look, take the pigmented colors along your lower last line. And you can use them for all kinds of great costume or Halloween looks as well!


So, what do you think about the bold color trend? Your cup of tea, or no?

Tuesday, April 22, 2014

Tip Tuesday: How to get more pigmentation out of your products, plus get a more even blend

Hi everyone. I get asked all the time about brushes. Which ones I use, which ones are better, which are cheapest yet still do the job, and more. Today, I want to share one makeup secret, that I feel a lot of makeup artists don't do or don't tell you that they do.... Use your fingers. It's kind of crazy for some people to think about that. I mean, it's free, we are constantly bombarded with expensive brushes and sponges. Your fingers are always there for you to use for lots of different things, why not your makeup application? I use my fingers a lot in my makeup routine. Plus, don't you find it kind of funny that you always use your fingers to blend moisturizer or serums into your skin. Why not foundation, blush, and eyeshadow? I find that especially with eyeshadows and other colorful products, like blush and bronzer, the pigmentation is more concentrated when you use your fingers vs when you use a brush. Here are a few tips that I use when I'm using my fingers to apply my makeup:

  1. Make sure your fingers are clean. You don't want to be spreading bacteria all over your face.
  2. Only pick up a small amount of your product. Especially if you don't know how pigmented it's going to be. You can always grab more if it's not enough.
  3. Use a light touch when you're applying the product to your skin. You don't want to drag or tug anything. Plus, it blends things a lot nicer when you use a light touch.
  4. Try to only use your fingers with lighter products. I find on myself, that I can get a great blend with lighter cosmetics when I use my finger than with darker cosmetics. But, that also depends on the products pigmentation, too. So, play around. You may love how your bronzer looks when you apply it with your fingers. 
So, do you use your fingers in your makeup application? 

Tuesday, April 15, 2014

Tip Tuesday: Using Eyeshadow for Eyeliner

Ever since I started doing makeup some 10+ years ago. I'm pretty sure the #1 question I've been asked, is how I apply eyeliner to make it look blended. Especially lately, since I've started this blog, I've had at least 1/2 dozen requests about eyeliner techniques. I'll try to get to a few others that I have up my sleeve in later posts, but today I want to touch on how to use eyeshadow as eyeliner. A lot of people think that since you can buy something specifically to line your eyes, that that is the one and only way to do it! I'm going to give you 3 reasons why I think using eyeshadow is BETTER than using an eyeliner pencil/pen/gel/etc:
  1. You can save some $. Just buy an eyeshadow palette that has a good range of colors that you can use for lots of different looks. Chances are that there will be some good eyeliner shades in there!
  2. Your eyes look bigger when you use eyeshadow instead of eyeliner. 
  3. Some people get carried away, and don't emphasize their eyes properly. Eyeshadow is more forgiving when it comes to making your eyes look like your eyes only better!   
A huge pet peeve of mine is seeing ladies wear eyeliner ALL THE WAY AROUND THEIR EYES!! With a liquid eyeliner. NO!!!!!! Do not do this I beg you! Our eyes are the most gorgeous things on our face. Think of them as a work of art. would you frame a work of art with a thin, bold, tacky frame? Instead, frame them with a dark shadow that is (gasp) three times the width of that eyeliner pen that you use. I promise it will look better! That being said, there is a  way that you can gracefully use that liquid eyeliner, so don't throw it out. I'll try to get to that in a future post.

Below, I've taken a very horrible shot of my own peepers to demonstrate the difference between lining with eyeshadow vs. lining with a liquid eyeliner. On the Left, I used a dark brown eyeshadow with the elf defining eye brush, only taking the shadow about 3/4 of the way from the outer corner to the inner corner. And on the right I used a liquid eyeliner all the way around my eye. Can you see how on the Left, my eye looks softer and bigger than on the right?


Another way to use your eyeshadow as liner and have it look more nighttime/smokey is to use a pencil eyeliner (NOT liquid), and then blend it with an eyeshadow that goes with it well (you can use a black eyeliner and blend it out with a charcoal eyeshadow for example). Or, you can also use a waterproof pencil eyeliner in your waterline (space between your eyeball and your eyelashes), then blend a coordinating eyeshadow underneath your lashes.

One thing that you want to keep in mind as you do your makeup, is that the outer portion of your eyes always needs to be darker than the inner portion UNLESS your eyes are very far apart. So, using a light shadow around your inner tear duct is another great way to open up your eyes.

There are lots of ways to use your eyeshadow as a liner. Try out some different ways on your own eyes, and let me know if you notice a difference in how your eyes look! Also, if you are more interested in my other tip/tricks of eyeliner, comment!

Tuesday, April 8, 2014

Tip Tuesday: A Natural, and effective way to treat Acne!

Lately I've had a few mild breakouts, and I've had to whip up a batch of my go-to acne toner that works SO good! So, this post was born out of my misery. Your welcome. Now, before I get to the recipe that I use, I want to share with you a few insights that I have on the main ingredient for the recipe, Thyme.

Thyme has been studied a lot lately for use in acne treatment. The findings have been stellar with results being better than that of prescription acne medication! Wouldn't you rather put something natural on your face than something harsh that is made by a chemist that will do who knows what to your skin??

Remember that prescription drug that was used for acne a number of years ago that they found was linked to birth defects? Ya, awesome. I'm not saying that all prescription drugs are that bad, but the truth is we just don't know what effects they may have on our bodies! Thyme has been use for THOUSANDS of years. The ancient Egyptians used it! And, no known harms have ever been documented from it's use. This is why I choose to use this ingredient rather than something from a chemical lab that heaven knows what it will do to my skin or body.

As you can see, I'm very passionate about my skincare. I try to keep it as close to nature as possible, using oils and herbs that won't cause harm or premature aging. This acne treatment is very effective and uses something grown right out of the ground. Win, win for me!


I would recommend tossing this mixture after 2-3 weeks. Since we aren't putting any preservatives in it, it may start to spoil. This recipe will probably last you that long if you are using it twice a day, so if you are only going to use it a few times, make a smaller batch.

If you are interested in reading more about one of the studies found on Thyme and acne, click here.


Tuesday, April 1, 2014

Tip Tuesday: De-puffing eye area

Today I'm going to give you some tips for making your eye area appear less puffy. I wake up with puffy eyes almost every morning, so I've mastered how to make my eyes look less puffy.

First of all, if you wake up to puffiness around your eyes, it's better to wait an hour or so before you apply any makeup. If that isn't possible, then here are some tricks that I like to use:

  1. Grab an ice pack! Or some other cold object. I know it's not the most comfortable thing to do on your delicate eye area, but icing can really reduce the puffiness quickly. I rarely use this method, but when I do it's almost instant and I only need to hold the ice pack on my eyes for about 30 seconds or so.
  2. Cucumbers! This age-old spa treatment works for a reason! Cold cucumbers placed on your eyes helps reduce the puffiness for 2 reasons. First, the cold helps reduce the swelling for the same reason an ice pack will, simple science; our bodies shrink a little when they are cold. Second, cucumbers contain natural flavanoids and antioxidants that help calm irritation that may be caused from sleeping/not sleeping, stress and environmental damage.
  3. Anti-puffiness eye creams and/or serums. Both before you go to bed and when you wake up are great tools for reducing puffiness. My two favorites are 100% Pure Organic Coffee Bean Caffeine Eye Cream & Lumene Vitamin C+ Anit-Puffiness roll-on eye serum (I think this one was sadly discontinued).
  4. If you don't have an Anti-puffiness eye cream or serum, then put your current favorite eye cream in the fridge over night and use it in the morning to get a great cooling effect that is sure to reduce the swelling!
 That's it! Thanks for stopping by! Let me know if you have any other tricks or tips on reducing eye puffiness!

Tuesday, March 25, 2014

Tip Tuesday: De-potting blushes

Have you ever heard of de-potting? I kind of go crazy with it. It is really easy to do and will really clear up the clutter in your makeup storage! Here is what you are going to need:

  1. Blush that you'd like to de-pot
  2. A thin, sharp metal object (I'm using a knife I got in a 4 pack from the dollar store)
  3. Flat Iron
  4. Small piece of Parchment paper
  5. Sharpie
  6. Empty magnetic pallet to put your de-potted goodness in when we're done
To start off, make sure your surface is stable and clean. Wash you hands and grab your product. Today I'll be showing you how to de-pot the Physicians Formula Blushes that I scored for $1 (read more about that here).

Open up both sides of the blush and place it on top of your flat iron (on the lowest heat setting), with parchment paper in between so you don't ruin your iron. Leave the blush on there for about 20 seconds. You don't want it too hot. Just warm enough to make the glue tacky. You could also use a candle or tea light for this. I like using a flat iron because I feel like you are less likely to burn yourself or your product with a flat iron. Just be careful with whatever you use in this step!

Next, take your thin sharp metal object. And slide it in between the pan and the product housing. Wiggle your metal object back and forth until you can get under the pan with your object.

Once you have your object underneath your pan, see saw until it pops free. Make sure you are super gentle, you don't want to ruin your blush!

Once it's out remove the glue residue from the back of the pan. This was very easy to do with these blushes, but you might have to get out the rubbing alcohol and scrub it off a little. I've worked with some that were way more tacky and hard to get off than these were. Again, make sure you are being careful, you don't want to break your blush!

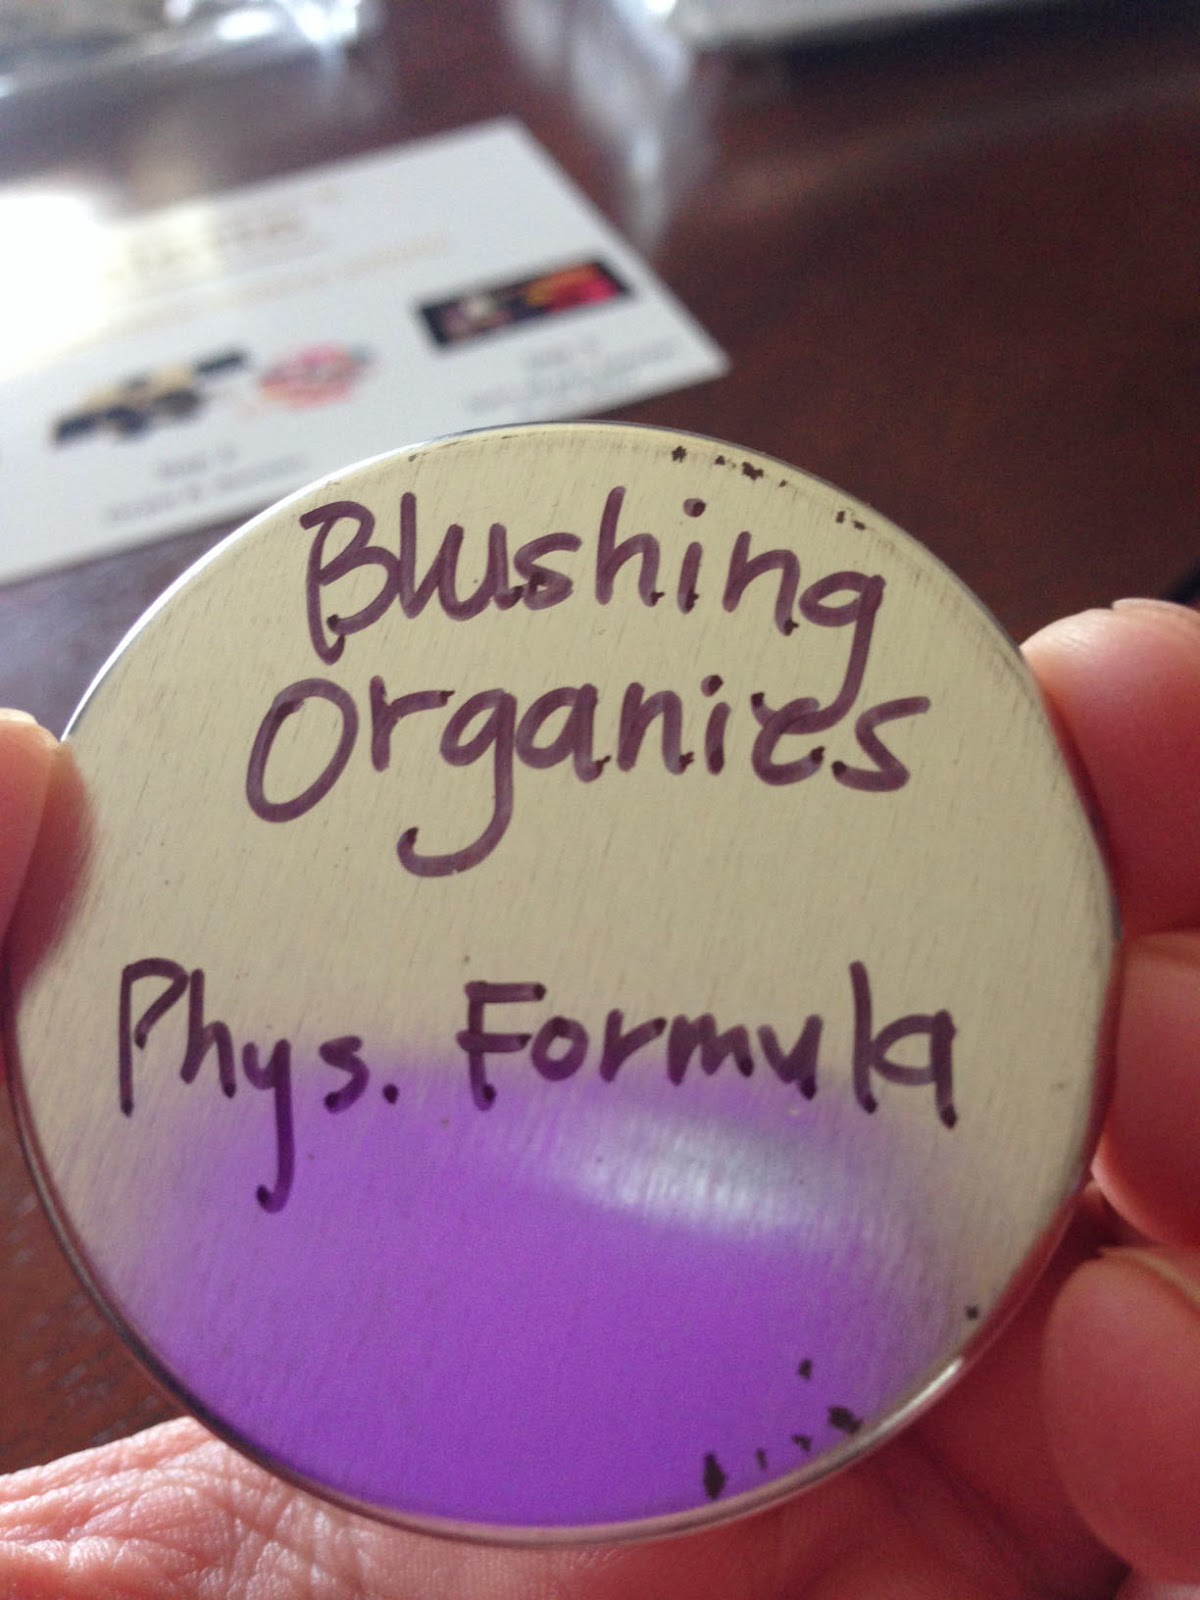
Label up the back of your pan for future reference of your product! Trust me, don't skip this step! Then, check to see if your pan is magnetic. If it isn't you'll want to put a magnet on the back (Z Pallets come with little round magnet stickers).

 Place it in your pallet and your DONE! Easy. And, your makeup clutter station will thank you!


Tuesday, March 18, 2014

Tip Tuesday: DIY Lip Balm

Remember when we pressed all those loose eye shadows, and we were left with a bunch of empty jars? Well, this week I'm going to give you a yummy recipe for your lips that you can use those jars for! I call this "White chocolate gloss". Today, I'll be making this with lemon flavoring, however, feel free to use whatever flavor you like. Or omit the flavoring, since the chocolate has great flavor on it's own. I just think that white chocolate, and lemon are a dream together. Here is what you'll need:


Small chunk beeswax (about the size of a small grape)- or other hard wax that is safe for cosmetic use
1 teaspoon coconut oil
1 teaspoon petroleum jelly
1 candy melts (I used yellow, since I'm making it with lemon)
Zip-top plastic baggie
Bowl of HOT water
1-3 drops of an oil-based candy flavoring (depending on how much flavor you want in your gloss - mine is obviously lemon flavored)
2-3 Clean Empty jars

Place the beeswax, coconut oil, petroleum jelly, & candy melt into the baggie and zip it shut. Then place it into your hot water.

Leave it there for 5-10 minutes, or until everything is melted together (the wax will be the last to melt, so make sure there are no small chunks), you may need to replace the hot water if it cools too much. Then massage the ingredients until they are smooth.

Dry off the outside of your baggy very well! You don't want water getting into your gloss. Then open your bag and drop in your flavoring. I used a medicine dropper for this, most pharmacy's will give them to you for free.

Snip the corner off of the baggy.

Start piping your gloss into your cleaned out jars. Tap the jars gently to get the gloss evened out. Then let them cool down. I placed mine in the fridge for a few hours.

This recipe filled 1 of my bigger jars, and 2 smaller jars. You can double or even triple the recipe if you want! These would make a great inexpensive gift, or they would be a great addition to a treat bag or gift bag for a party! Have fun, and make sure you come back for next tip Tuesday!


Tuesday, March 11, 2014

Tip Tuesday: How to Press loose eyeshadows

Do you have jars of loose eyeshadows or pigments that you never use because they are too messy or inconvenient? I did! I had been keeping a lot of loose eyeshadows in a case for 3 years and had barely touched them. Some even still had stickers over the sifters. I prefer pressed eyeshadows, so I decided that I would press my jars of loose eyeshadows. Here is what I did, and advice I learned while doingit!

What you'll need:
  1. Rubbing Alcohol (The higher the percentage, the better!)
  2. Loose eyeshadow
  3. Magnetic pans
  4. A coin that will nest inside of your pans (or a pressing tool)
  5. A pipette (or a medicine dropper - most pharmacy's give them to you for free)
  6. A cosmetic spatula
  7. A small dish
  8. A pallet for your eyeshadows once they are pressed
  9. Paper towels 
  10. More paper towels
  11. A sharpie to write on the back of your pans
 The first thing you need to do is cover your workspace. Things WILL get messy, so make sure you can clean it up easily. Some eyeshadows can stain. Then, you need to grab one of your pans, and label the back for reference. This eyeshadow I'm showing was from Everyday Minerals and it was called "Twilight Kiss".

Now comes the fun part. Make sure you wash your hands. Then grab the jar of eyeshadow, unscrew the cap, and remove the sifter with your fingernails. Be careful not to pry too hard, it shouldn't be terribly difficult to get off. Then empty the powder into your clean dish.

 Squeeze some alcohol into your pipette, and start dropping it into your eyeshadow. Only do a few drops at a time. Then you are going to start mixing it together with your spatula.

 Keep adding drops of alcohol and stir until you have the consistency of wet sand. You want it to clump together, but you don't want it too wet.

Now, start to carefully scrape the wet eyeshadow into your pan.

Once you've got it in there, you need to grab a paper towel and place it over your pan of eyeshadow, then place your coin on top and PRESS HARD.

Take of the paper towel carefully, and that's it! You're done with the hard part. Now you just need to let it air out for a solid 24 hours so that all that alcohol dissipates. My shadows were dry to the touch after about 3 hours, and didn't smell like alcohol at all, but I still waited to use them just in case. I'd say after 24 hours you will definitely be okay to use them.


A few things I learned while I was doing this:

  • All of the shadows I used were "mineral" eyehshadows, however some of them did not bind very well with only alcohol and crumbled after they dried. If this happens try mixing them again with a few drops of biosilk or another silicone-based hair styling aid and the alcohol. I had to re-press about 7 of the 20 eyeshadows I did with biosilk.
  • Try to get the eyeshadow in the pan as evenly as you can. I didn't with some, and thought that by pressing with the coin it would even out, and I was wrong. There were holes where I didn't place the product. 
  • This didn't happen to me, but I read on a website that magnetic pans are made with tin, and non magnetic pans are made with aluminum. Since mine were magnetic they were tin, and tin will rust when contacted with water for an extended period of time, so using a higher percentage of alcohol will reduce the risk of rusting. If you can find 99%, then get it. My drug store's highest was 91%, and I have yet to see any problems 1 week after pressing. 

This was such a fun project, and I feel like I got a brand new pallet of eyeshadows, since I wasn't using these anyway in the jars.

Make sure you keep your jars! I'll be showing you what you can use them for in following weeks!


Tuesday, March 4, 2014

Skin care Week Tip Tuesday: Activated Charcoal - How to use it in your beauty routine

Have you ever heard of activated charcoal? It is charcoal that has been treated with oxygen to open up millions of tiny pores between the carbon atoms. Which, in simple terms, means that it absorbs impurities (activated charcoal is used in water filters for it's absorbing benefits). It's starting to become a well known staple in the beauty world with companies like Biore, Garnier, Michael Todd, and Freeman Beauty all using it in recent releases of masks and cleansing products. But why is it so special? I have a few reasons why you need to keep this amazing ingredient in your medicine cabinet.


1. Activated charcoal can be used on your face to rid your skin of toxins and other impurities. It seems like skin care companies are exploding with new products containing activated charcoal. But, with a few easy steps, you can use this powerful detoxifying ingredient without running to the store. Grab 1 capsule of activated charcoal, 1 teaspoon Aloe Vera Gel, 1 teaspoon water, a few drops of tea tree oil, and a pinch of sea salt. Open the capsule of activated charcoal and empty it into a dish, then mix in all the other ingredients very well and apply it to your face. Be careful, it can stain your clothing (however, this mask will not stain your face). Leave it on for 10-15 minutes or until dry, then rinse it off. This mask it great for acne prone skin as well as oily skin, as it pulls out impurities. Be aware that your skin will feel amazing afterwards.

2. Activated charcoal is a great way to whiten teeth without killing your enamel and/or using harmful ingredients. There are a few different methods for using activated charcoal for teeth whitening.
  • Sprinkle a small amount on your toothbrush that already has toothpaste on it, then brush very gently.
  • Mix activated charcoal with a tiny amount of water to make a thick paste, and apply it to your teeth very delicately and leave on for 5 minutes.
  • Mix 1 activated charcoal capsule to 2 Tablespoons of water, and swish in your mouth just as you would mouthwash.
Be aware that your mouth will look gross while doing any of these treatments, however, when you  rinse really, really well with water, you will be amazed at the results of how white your teeth are afterwards!

3. Lastly, activated charcoal can absorb toxins in your body. Do you have toddlers at home? Then activated charcoal is a must! If your little lady or little man, has a tendency to get into things he or she shouldn't (translate: all toddlers), there is a huge risk of them ingesting something that could be very harmful. Activated charcoal can help a great deal in these sorts of situations. If administered soon after a toxic substance, activated charcoal can absorb all the yuck, making it truly life saving if the situation is serious enough. They will even use this method in hospitals. However, you don't have to have a toddler at home to reap this great benefit of activated charcoal. Do you have a favorite, yet shady, Mexican joint that you like to eat at here and there? Does that favorite Mexican joint make you feel yucky afterwards? Some people think that eating at certain places, and feeling yucky after the fact, is due to not being used to the food. Most of the time, it's because of the foreign or toxic substances in the meal that make us feel sick afterwords. So, taking activated charcoal after a questionable meal can greatly reduce those feelings of "yuck", and possibly keep you from getting sick as well.  

There you have it. How do you use activated charcoal? I'd love to know in the comments.  

Tuesday, February 25, 2014

Tip Tuesday: Using Bright Blushes


One of the more widely used items in my makeup case, are my blushes. I love how they make me look like I'm not dead, and that they can perk up even the most bland of skin days. As we head into spring, I feel like the most colorful and spring-like thing you can add to your makeup routine is a bright eye popping blush! I have several blushes in my collection that would make most people cringe, but here are 3 reasons why I love them so much.

1. Bright washes of color on the apples of your cheeks makes you look more youthful. I was reminded of this on Sunday when I was curling my 6 year old daughters hair. Her cheeks had this hint of color on them that made her simply glow. As we age our skin looses pigmentation. So, adding that pigmentation on your cheeks makes you look younger.

2. It can save you money! This post was inspired by a bright blush I purchased just yesterday (I'll tell you more about that in my haul post on Friday). Bright colors can make for some very clown-like looks if you aren't careful. But, with a light hand and a good quality blush brush, you can use a very minimal amount of that blush, so it will last a long time. And, if you read my haul Friday post, you'll see just how affordable it truly can be!

3. Bright colors show up and look great on everyone. From the lightest of lights to the darkest of dark's. Bright, bold colors are universally flattering no matter what color your skin might be. I'm very pale, and you would think that using a bright, highly pigmented blush would make me look like I've got neon cheeks. However, I apply it very carefully and with a light touch to both the product and my skin. So, I'm left with a light wash of brightness that wakes my face up and makes me look alive again. You can always add more blush if you feel like the pigmentation isn't enough for you, so build it up until you get the color you want. But, always start with a very small amount.

So, there you have it! Below I've given you some examples of the blushes that are in my collection that are super vibrant and pigmented.


1. Maybelline Master Glaze Blush in "Pink Fever"
2. NYX Rouge Cream Blush in "Glow"
3. bareMinerals Blush in "Fruit Cocktail"
4. elf Studio Blush in "Pink Passion"
5. essence Silk Touch Blush in "Life's a Cherry"


Tuesday, February 18, 2014

Tip Tuesday: Coconut oil-how I use it in my beauty routine


Behold the power of coconut! I'm addicted to this little gem, and for many reasons! I'm sure you've heard of the many benefits of coconut oil for the skin, hair and body. It's something that is quickly becoming a household staple for many people. I use coconut oil for lots of things, including cooking and baking. It's a 1:1 substitution for butter. And, it's probably the most versatile product in my beauty arsenal. Here are some of the ways I like to use this wonderful oil in my beauty routine.


As a hair mask:
Coconut oil as a hair mask is so perfect. It has essential fatty acids that can repair damage, and it's super moisturizing so it leaves behind a beautiful sheen without making your hair look "oily". I will use coconut oil on my hair 1-2 times per week during the summer and more than that during the winter if my hair needs it. Typically I will mash it with a dropper full of argan oil, too. Argan oil is full of vitamin E, which coconut oil lacks, so they make a great pair. I will leave it on for around an hour, but you can leave it on over night for a deep repair if needed. When your done, just shampoo your hair a few times, until it feels clean again. No need for conditioner after a treatment like this.

As a moisturizer:
Swapping coconut oil for lotion is simple! Plus, coconut oil is GOOD for you skin, where most lotions and creams you buy at the store are full of chemicals like parabens. I like to slather my skin in a good healthy coating of coconut oil right after I get out of the shower. It only takes a few seconds for the oil to absorb into my skin, and it leaves my skin looking like I have a satin-like glow.


As a mineral makeup base:
I love me some mineral makeup! It's natural, it has a beautiful finish, and it's good for your skin. During the summer months, mineral makeup is my every day staple. But, in the winter, my skin gets a bit too dry to use it without looking like a chalky mess! Coconut oil to the rescue.... I will place a tiny amount of coconut oil in the palm of my hand to warm it up so it melts, then I'll tap some mineral foundation on top and swirl it around to make a liquid foundation consistency.  Using my fingers or a foundation brush, I'll apply it to my face and buff it into my skin. It transforms my powdered mineral foundation into a moisturizing tint that covers and blurs all my imperfections. And the best part? It's chemical free! And, again you guessed it-good for your skin.

As a makeup remover:
Have you ever bought a mascara that was fabulous, and didn't flake at all, and didn't smudge at all, and was waterproof, so you could cry, swim and sweat and it would still look awesome? And, did that same mascara haunt you at the end of the day after you've scrubbed everything else off your face? Ya, been there. But, now you can remove it so fast and easily now that you have coconut oil in your bathroom cabinet. Just massage a pea sized amount onto you closed eyes, for about 30 seconds, then wipe clean with a warm, damp wash cloth. I promise it will come off with this technique. It has saved my eyelashes more than once! Just please make sure you don't get the coconut oil in your eyes. While it's natural and most people say it's okay for you to put coconut oil in your eyes, your eye makeup may not be okay to get in there.

As a scrub:
Okay, coconut oil alone is not a great scrub. But when you mix it with a tiny amount of baking soda it's amazing! Seriously, nothing makes my skin feel as baby soft as when I use this 2 ingredient scrub. Just warm a small amount of coconut oil in the palm of your hand, then sprinkle a tiny amount of baking soda on top. Swirl it together to make a thin paste, then very gently buff it onto your skin. Gently being the key word here. You don't want to be too harsh or you could irritate your skin. Gentle, circular motions with the pads of your fingertips for about a minute, then rinse off. It's easy and so effective, and also so much cheaper than scrubs that you buy at the store. Plus, again, it's natural, so no worrying about a chemical rash or worse!

As a replacement for neosporin:
Yes, you read that right. You can swap coconut oil for neosporin! It is antibacterial and naturally lubricates the cut or scrape and promotes healing. If your worried about it not killing enough germs, and the cut is pretty deep, you can also add a drop of tea tree oil with you coconut oil, and that will boost the antibacterial action by a lot. Just, make sure you wash the wound with warm soapy water before applying your oils.

And, that's it! How do you use coconut oil? Comment below and share!